Today I tried Color Efex Pro 4. A user friendly preset that is compatible with the Adobe software. I used it in combination with Lightroom. Here's how it works.
Open Lightroom, pick an image and follow your normal workflow. Then, for even more editing, move to Color Efex Pro 4.
Go to Photo > Edit in and choose Color Efex Pro 4
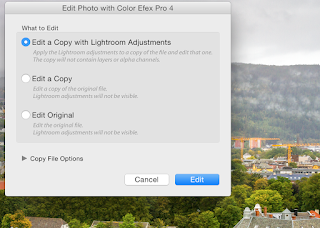
A pop up screen appears
Most of the time, you'll choose the first option and click on Edit.
Your picture will now, with all the Lightroom edits, be opened in Color Efex Pro 4.
On the left side you have a lot of presets available classified by category. For example Travel presets:
At the top you can compare the picture with the original.
You can do Local adjustments by using the control points. Activate a control point and click on a specific part of the picture. There you can change some local settings.
When you're done in Color Efex Pro 4, click on the save all button and the picture will be reimported in Lightroom.
Color Efex Pro 4 has tons of templates which can be helpful to edit a picture. In combination with the Adobe Sofware it's sure to increase your creativity
And have you already discovered our brand new Facebook page Humans of the Nordic Region?


No comments:
Post a Comment