
1. Open your image
2. Open the channels in Photoshop (Windows > Channels). The technique is based on the differences between dark and light.


In this case you can see that the blue channel gives much darker hair than the red channel.
3. Make a copy of the blue channel

4. Clicking on the Copy of the blue channel holding Ctrl or Cmd. You now see that the light part of the picture is selected

5. Go the layer panel and click on the Masking icon
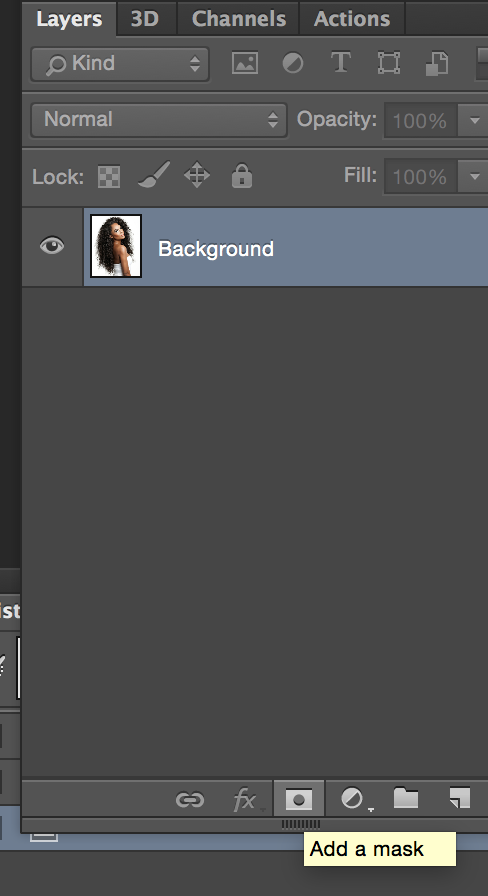
6. You now have a new layer with the light part selected

But it's the dark parts of the image (the curly hair) we need
7. Invert the mask using Ctrl or Cmd I

8. Using the brush tool you can paint the parts of the picture that you want darkened (in this case her dress etc...)

When you put another coloured layer underneath it, you see that the hair is perfectly cut out from the background.

The only problem is the white areas at the end of her hair. You can darken those using a clipping mask in combination with the clone stamp tool or the brush:
1. Add a new layer on top

2. Make a a clipping layer from this background, so that it's attached to the selection.

Now the layer is clipped:

3. Set the blending mode of the layer to darken. Use the Clone stamp to darken the light from the inside to the outside. Be sure the sample is on this layer and below and the flow is around 30%
Voila, this is the end result:

By changing the color of layer 1, you can easily change the colors of the background


No comments:
Post a Comment